
Set up your customer agent
Three paths to stand up the agent you ship to customers. Catalog, Assistant, or Designer. Pick whichever fits how you'd rather work.
Overview
Before you can invite a customer, you need an agent that can answer them. Step 3 of the onboarder ("Set up your customer agent") gives you three ways to build one. The fastest is to install a Solution from the catalog — it stamps out a customer-facing agent with the skills, tools, and routines for a job already wired in.
Whichever path you take, you end up with a regular agent: a named, customer-facing worker you can edit, rename, or replace like any other. Build more agents alongside it when your product needs them (a releases helper, an ops bot, a specialist sub-agent it can delegate to).
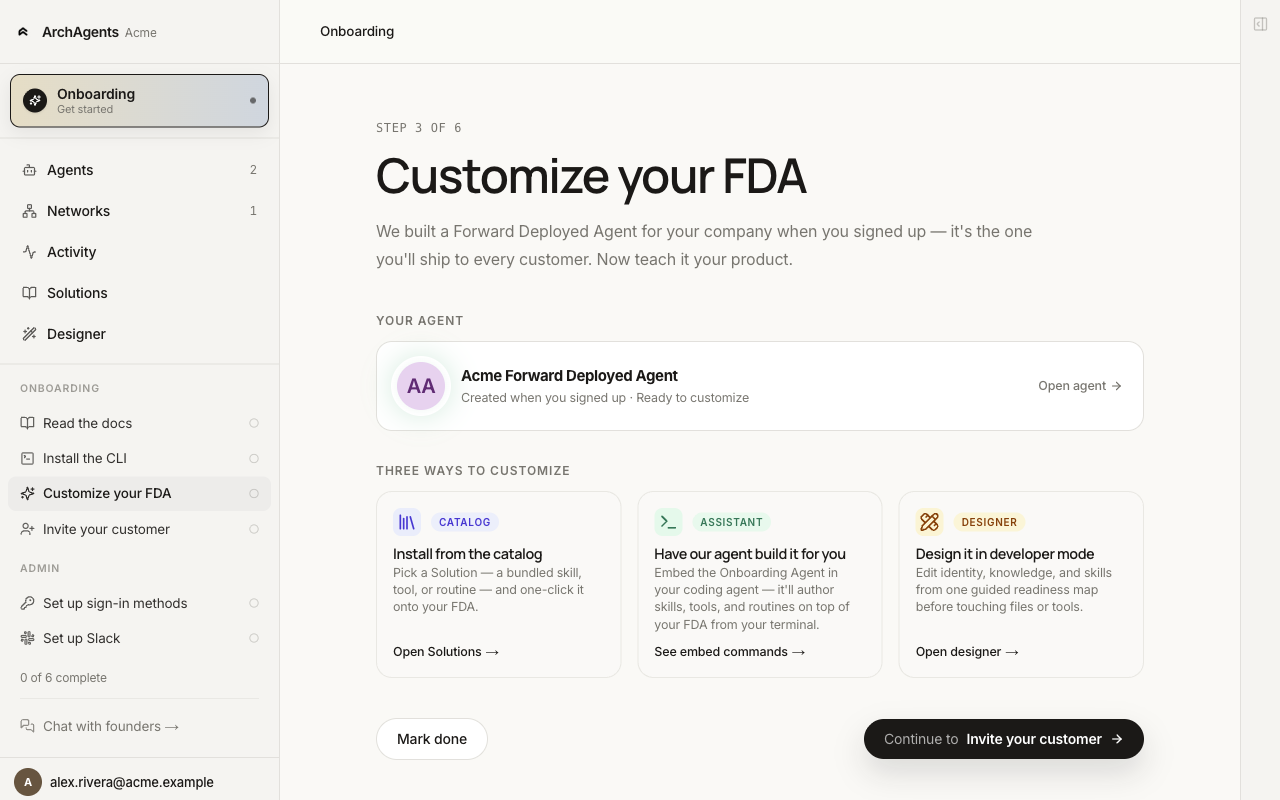
The three paths
| Path | What you do | When to pick it |
|---|---|---|
| Catalog | Install a Solution that already knows a job. | A Solution matches what you do (incident response, onboarding, customer support). Fastest. |
| Assistant | Open the Onboarding Agent in your coding tool and let it interview you, author skills, and deploy. | No Solution matches and you'd rather describe than build. |
| Designer | Open the visual builder and edit identity, tools, skills, and routines by hand. | You want to see each piece and adjust them directly. |
You can switch between paths. None of them lock you in. Start with Catalog if a Solution fits and switch to Designer to fine-tune from there.
Path 1: Catalog
The Solutions catalog at /solutions lists pre-built bundles for common jobs. Import one that matches what your product does for customers; the bundle's templates appear under Available templates and you install them to stamp out a working customer-facing agent (or attach them to an agent you already have).
Best when:
- Your product fits a category that already has a Solution.
- You want a working agent quickly and plan to refine later.
archagent list solutions
archagent import solution <slug>
archagent list agentsamples
archagent install agentsample <slug>
See Solutions for the import + install model in full.
Path 2: Assistant
The Onboarding Agent is pre-created in every workspace. It's an agent built to learn your business and build your customer agent with you. Embed it in your coding tool and it interviews you, drafts the templates, and deploys them.
archagent embed start # pick "Onboarding Agent" from the interactive picker
Then prompt it:
I run a billing platform for B2B SaaS companies. Customers ask us about invoice
disputes, plan changes, and payment retries. Build me an agent that can help with
the first two and hand the third to a human.
The Onboarding Agent is configured to ground recommendations in the actual platform primitives (AgentTemplate, AgentRoutine, BuiltinTool, Script, CustomObject, Skill, Solution, Installation) rather than generic agent-design talk. It stores what it learns about your company in long-term memory so each session picks up where the last one left off.
Pick this when:
- Your product is specific enough that no Solution matches.
- You'd rather describe what you do in plain language than learn the template format.
- You want a coding tool to do the typing.
Path 3: Designer
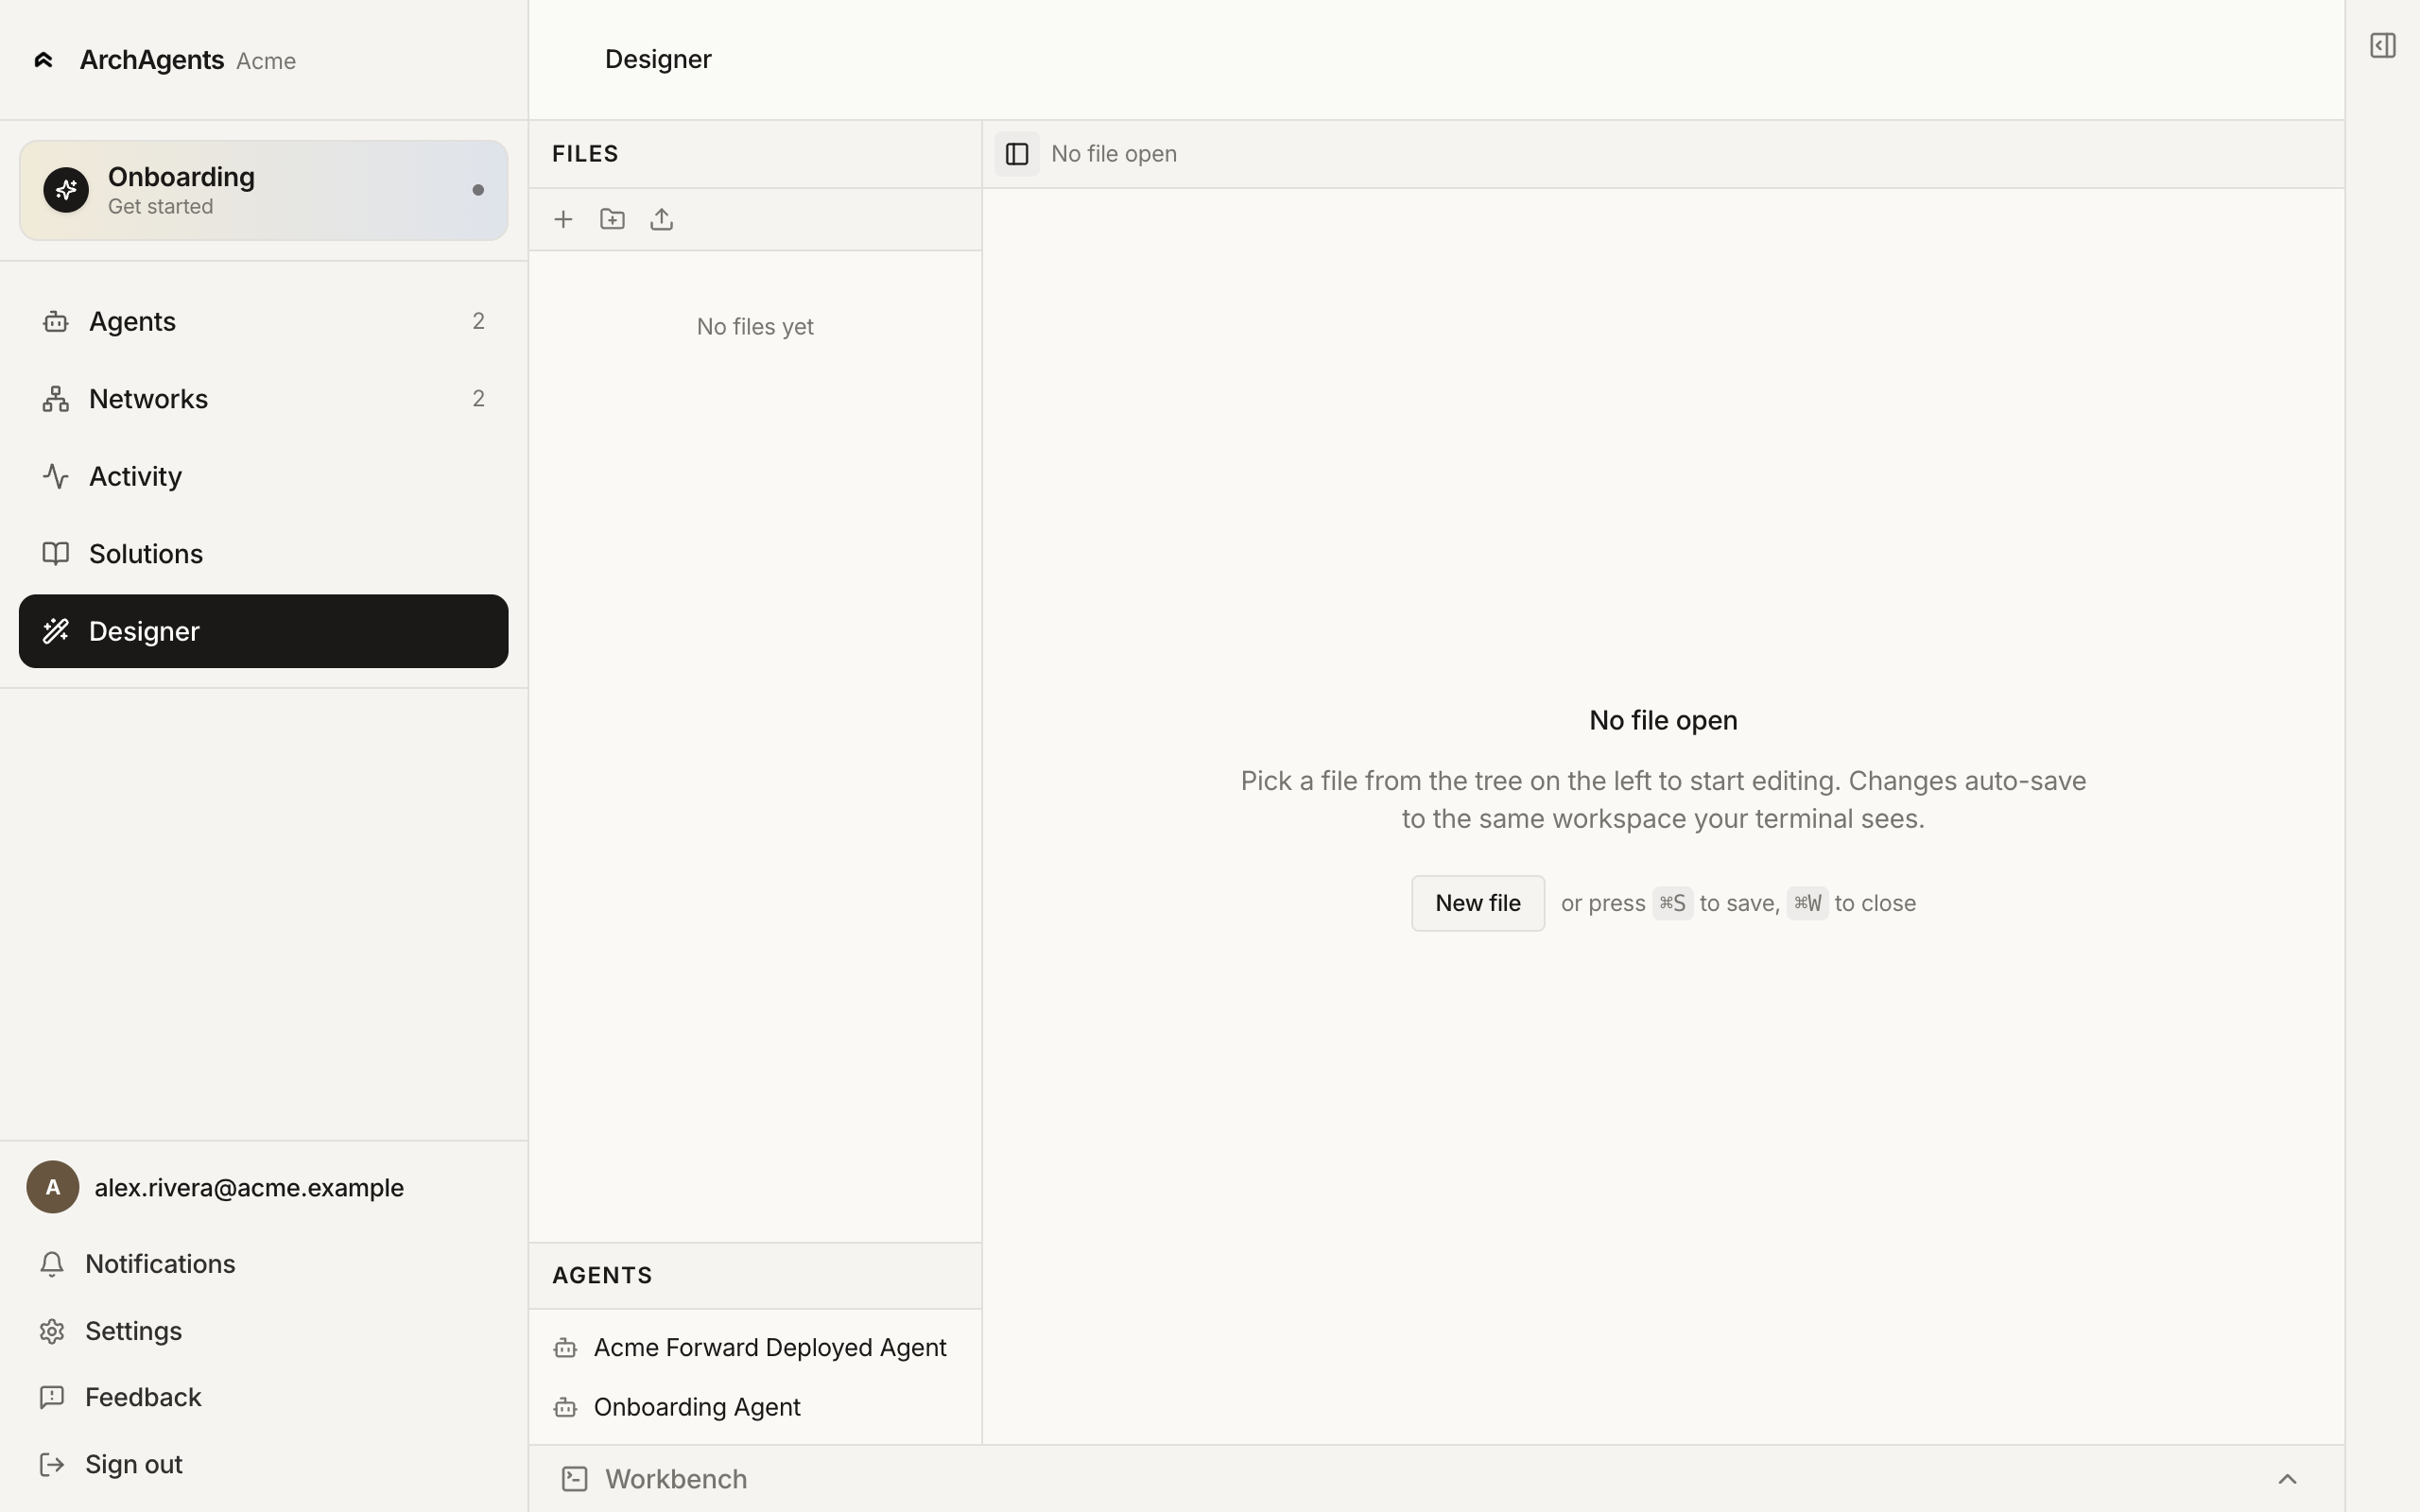
The Designer (/designer) is a visual editor for agent templates, scripts, skills, and workflows. Open it and edit each piece directly: identity, instructions, attached tools, knowledge, routines.
Pick this when:
- You want to see each piece and edit it precisely.
- You're tuning an agent you already stood up via Catalog or Assistant.
- You don't use a coding tool and don't want to learn the CLI.
Changes auto-save to the same workspace your terminal sees, so you can switch between Designer and archagent mid-edit.
After Step 3
Whichever path you took, your customer agent now has skills, tools, and routines attached. Confirm it works:
- Open the agent from
/agents. - Use the CHAT section in the left rail to send a question your product would actually get.
- Watch the response. If the agent uses the wrong tool, the wrong skill, or hallucinates an answer, go back to the path you used and adjust.
Then continue to Step 4 (Invite your customer) when the agent can handle a real question end to end.
Where to go next
Have feedback?
Help us make this page even more useful.
Tell us what you'd like to see expanded, which examples would help, or what workflow you want covered next. Every message gets read.