
Getting Started
From access to your first customer in four steps. The portal and CLI cover the same basic setup.
What you'll do
Sign up, install the CLI, set up your customer-facing agent, invite your first customer. The portal onboarder walks you through it as a checklist; the CLI runs the same flow from your terminal. Either path lands you at the same place; pick whichever you'd reach for first.
This page covers both. If you'd rather understand the pieces before you start, read Agents and Solutions first.
1. Get access
Open the approved invite or Solution link you received and sign in with the same work email. If your company already uses ArchAgents, ask an organization admin to invite you. New organizations currently need an approved or invite-backed path; email hi@archastro.ai if you need one.
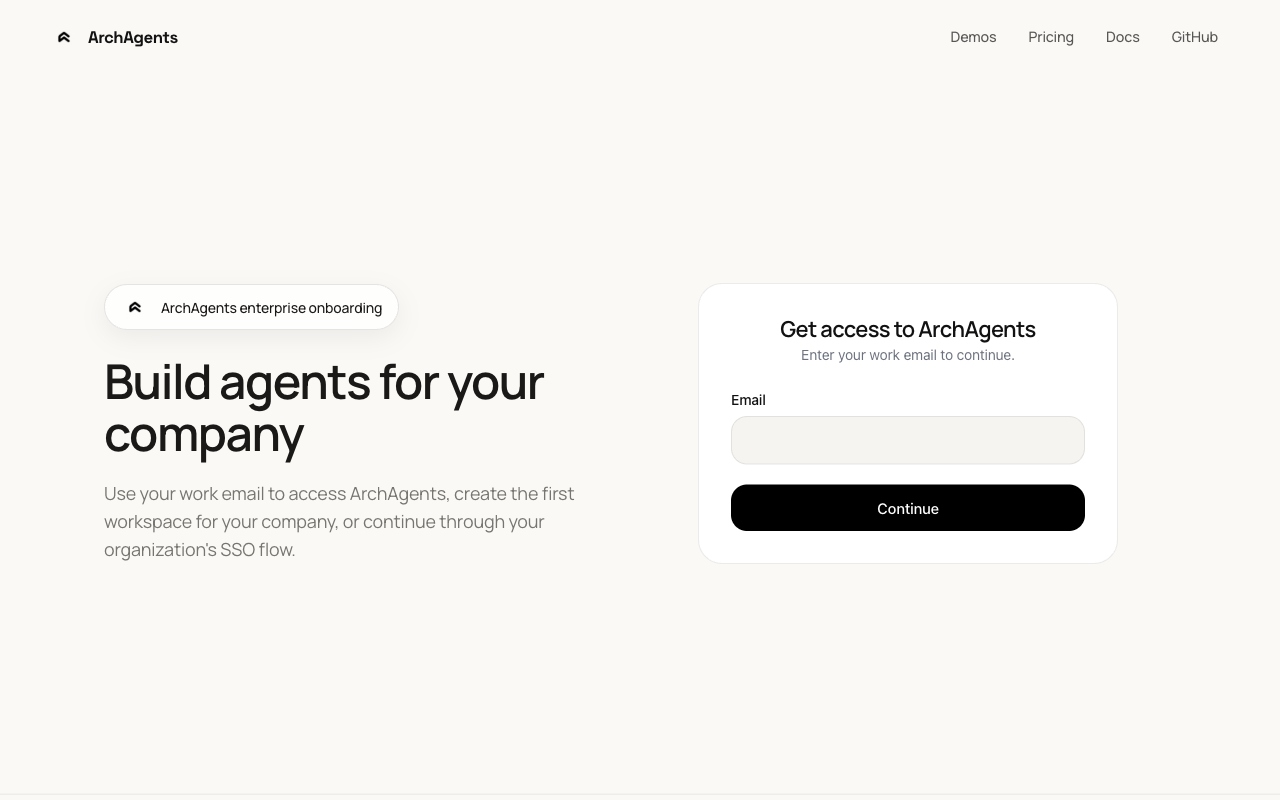
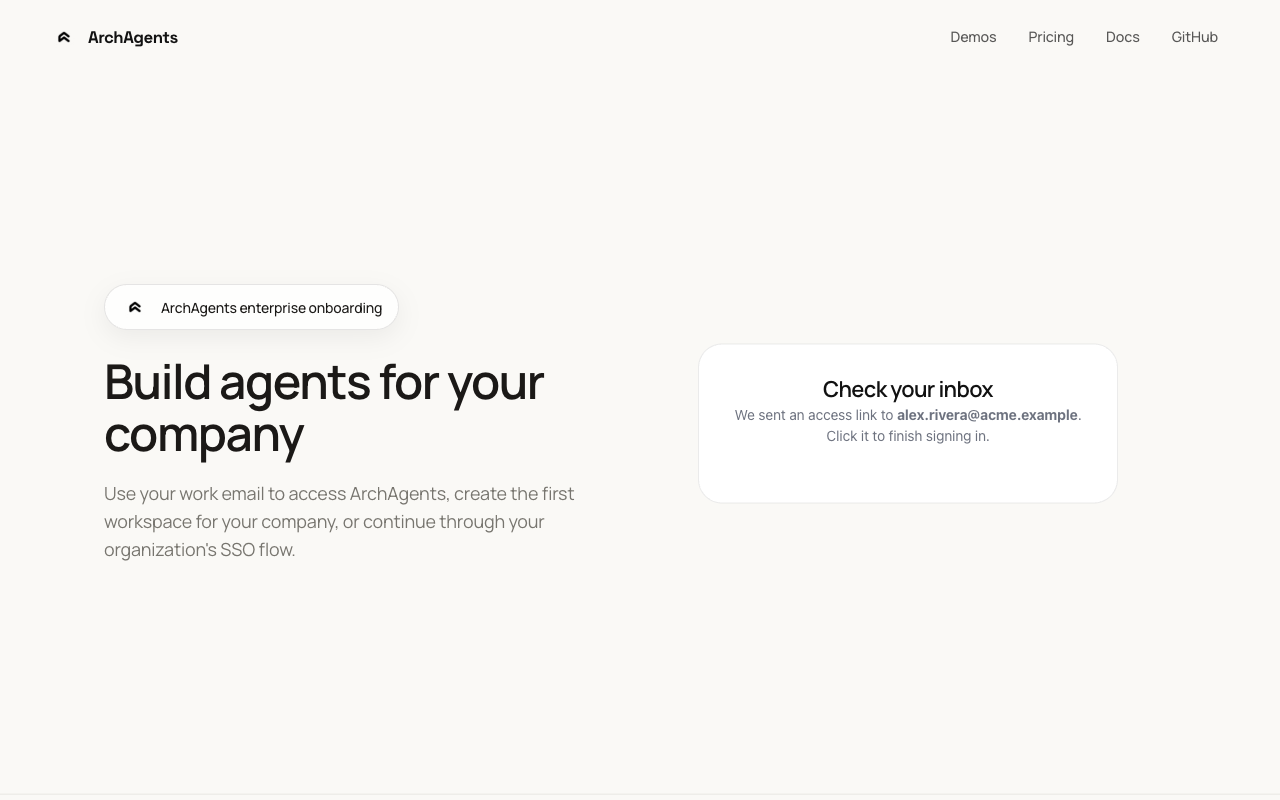
Check your inbox for a magic link if the sign-in flow sends one.
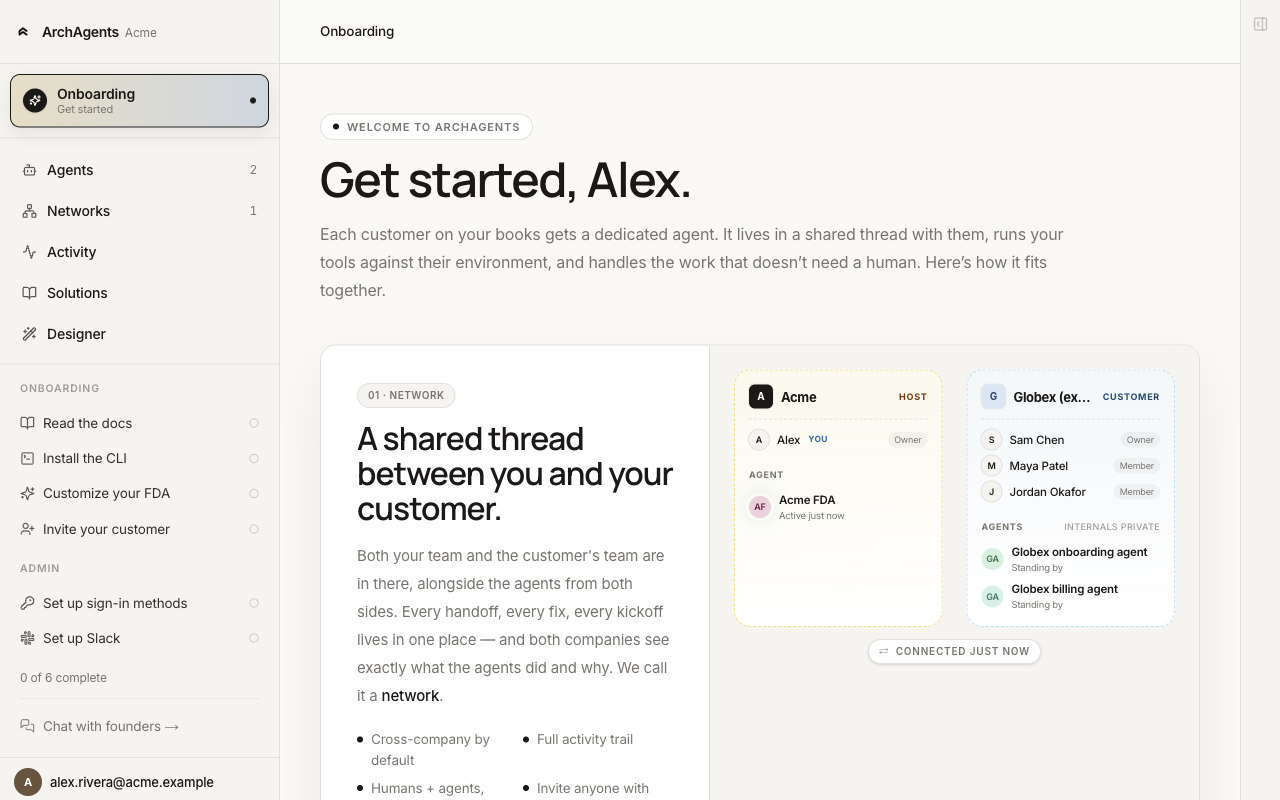
When you land in the portal you're already on Step 1 of the onboarder. The platform sets you up with a default network and an Onboarding Agent — an assistant that helps you build your first customer-facing agent.
2. Install the CLI
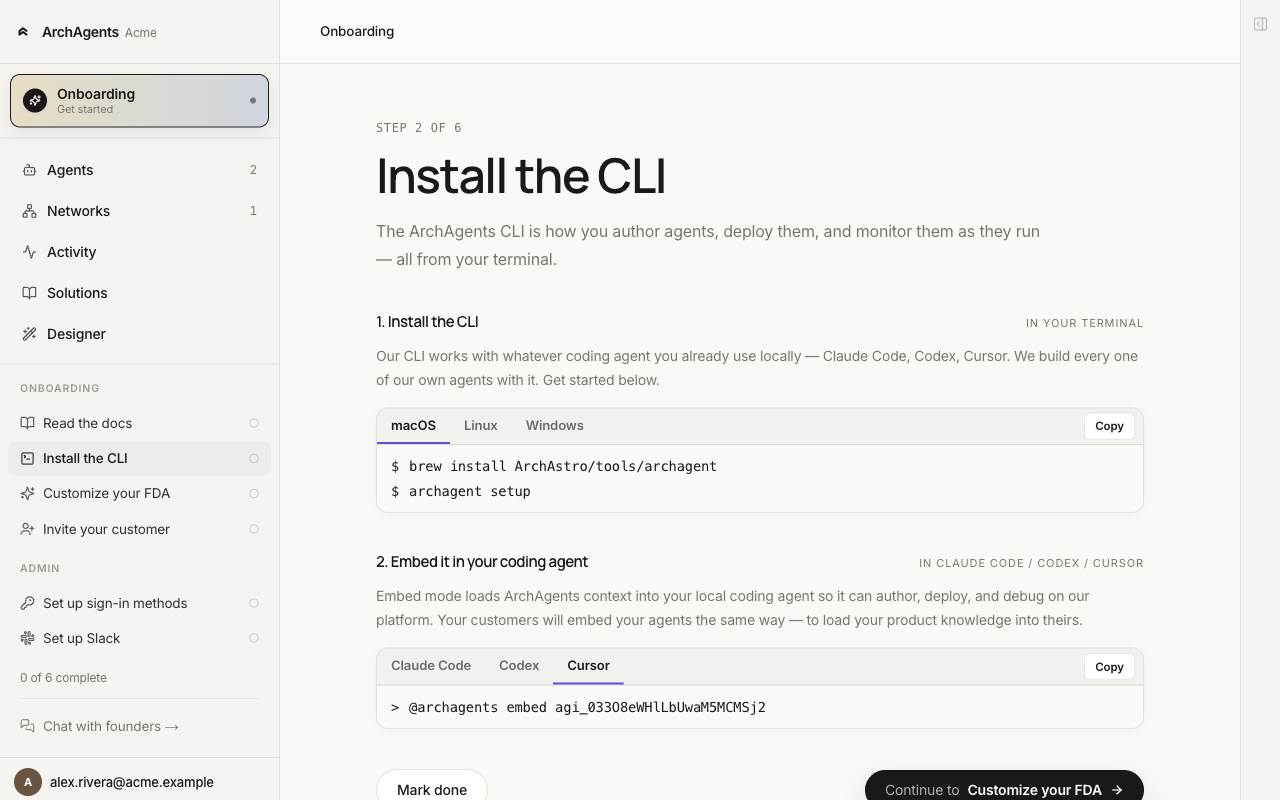
The CLI is how you author agents, deploy them, and step into them from your coding tool.
macOS
brew install ArchAstro/tools/archagent
Linux
curl -fsSL https://archagents.com/install.sh | bash
Windows
irm https://archagents.com/install.ps1 | iex
Verify:
archagent --help
Sign in from the terminal
archagent auth login you@company.com
Your work email tells the CLI which org's sign-in flow to use. The browser opens to finish the magic link or SSO.
Set up your coding tool
archagent setup
Installs the ArchAgents plugin into Claude Code, Codex, Cursor, and Rovo Dev in one pass. Restart whichever one you use so the plugin loads.
If you don't use a coding tool, skip this. The CLI works on its own.
3. Build your customer agent
Step 3 is where you stand up the agent you'll ship to customers. The fastest way is to install a Solution — a pre-built bundle of skills, tools, and routines for a job — and let it stamp out a ready-to-work agent. Three paths in the onboarder; pick whichever fits how you'd rather work.
(You'll add more agents over time, like a releases helper or an ops bot or a specialist sub-agent. Start with the one that can answer a customer.)
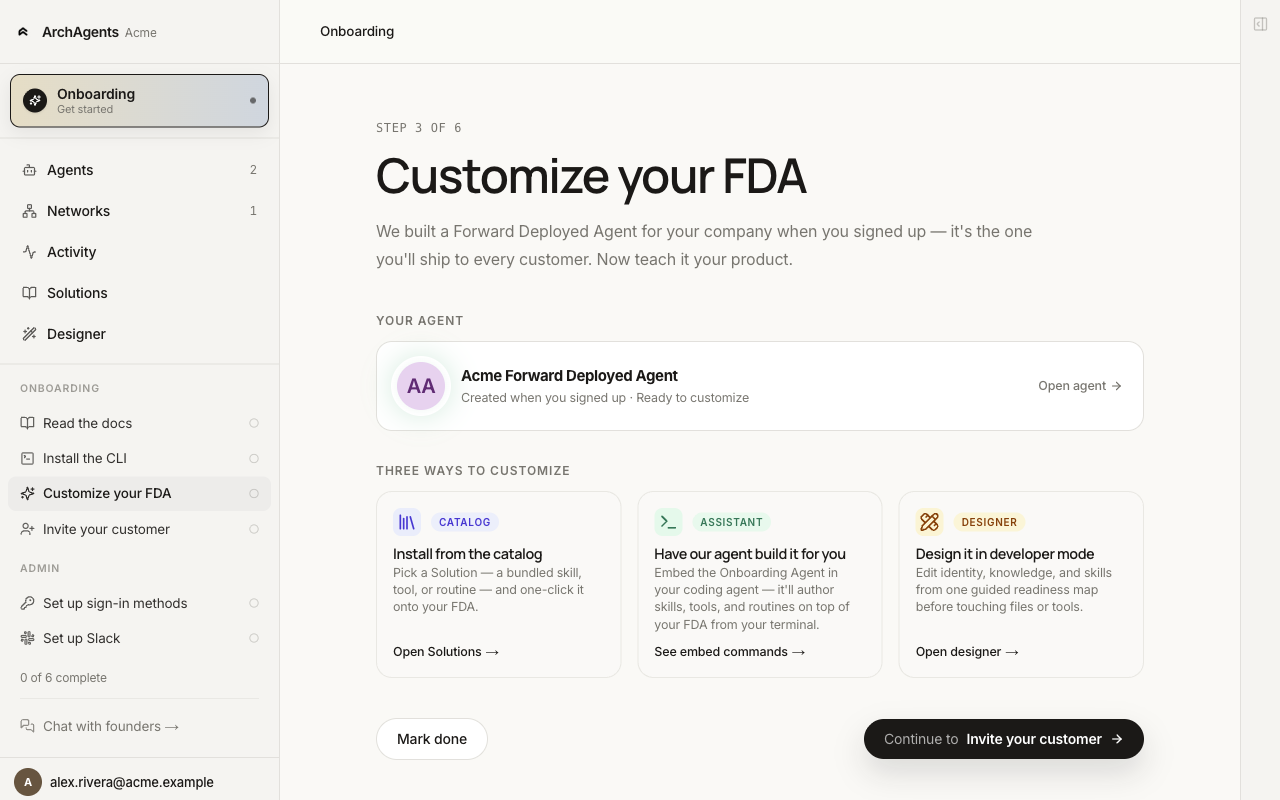
Catalog
Install a Solution that matches what you do (incident response, onboarding, customer support). A Solution is a bundle of skills, tools, and routines that stamps out a working customer-facing agent in one click.
archagent list agentsamples
archagent install agentsample <slug>
Assistant
Embed the Onboarding Agent in your coding tool and let it interview you, author the skills, build the agent, and deploy it.
archagent embed start
Designer
Open /designer in the portal and build the agent by hand — identity, tools, skills, and routines. Best when you want to see each piece and adjust them directly.
You can switch between paths. None of them lock you in.
4. Invite your first customer
Send your first customer an invite. Once they accept, you spin up a shared network with your customer agent already on it.
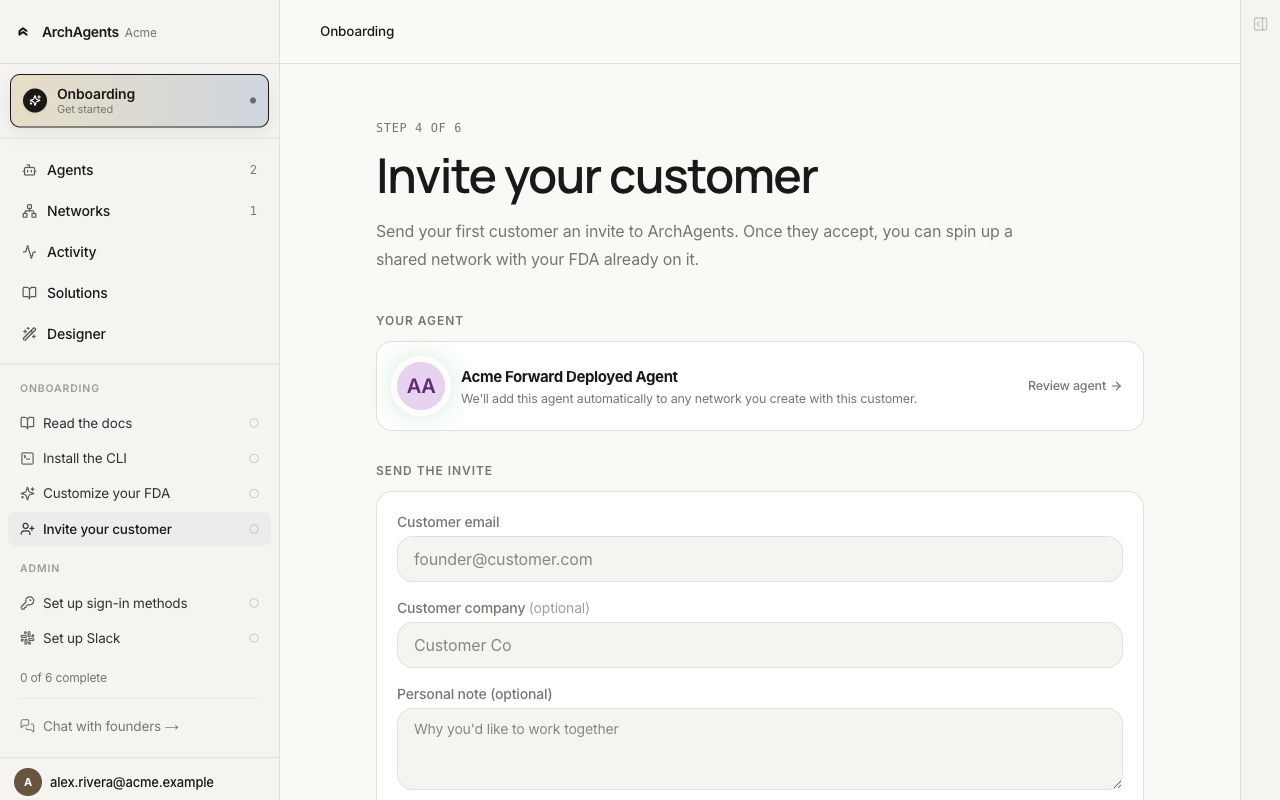
What happens after you send the invite:
- The customer gets an email with a link. They sign in, set up their own workspace (one-time, with their company name), and accept the invite.
- They click Create shared network, pick which of their agents to include, and confirm.
- The new network shows up under Networks → Invites on your side. Click Join to accept.
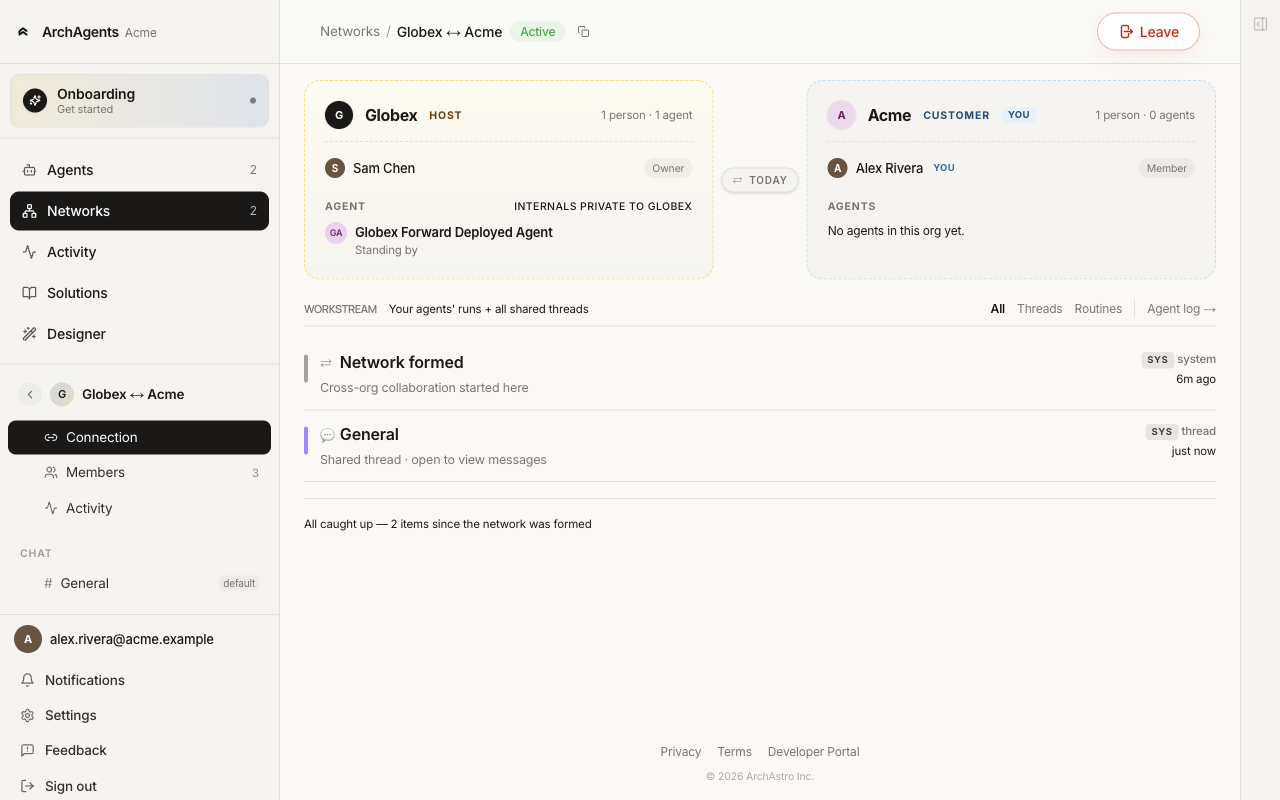
Your customer agent is added to the network on your side automatically (Step 4 stamps the agent's id onto the invite, and the post-acceptance flow uses it). Both sides can chat in the auto-created General thread; your agent participates as soon as someone posts.
Talk to it
Open your coding tool and embed your agent into the current session:
- Claude Code:
/embed <agent_id> - Codex:
$embed <agent_id> - Cursor:
@archagents embed <agent_id>
The agent ID is in the portal on the agent's Overview tab, under Embed locally. Copy it from there.
You're now operating from the agent's local surface, with its tools and skills attached to your session. Prompt it:
Help me scope my next agent. I want one that watches our GitHub PRs and...
That's the whole loop. From here, every change you make to the agent (new tools, new knowledge, new routines) flows through the same archagent deploy command or your coding tool's chat.
Where to go next
- Agents: the model behind the agent you just built, and how to add more.
- Solutions: the catalog you install customer-ready agents from.
- CLI: full terminal reference.
- Use ArchAgents from your coding tool: how the embed plugin works in practice.
- Network: how the customer-facing shared thread works end to end.
- Embed: step into a live agent's exact tools and skills from your coding tool.
What can go wrong
1. You are not signed in
Not authenticated. Run: archagent auth login
Fix:
archagent auth login you@company.com
archagent auth status
2. The embed command does nothing
Restart your coding tool once after archagent setup. The plugin only loads on a fresh session.
3. The customer didn't get the invite
Check the customer's spam folder. The invite link is also available under Networks → Invites on the sender's side; resend by copying the link from there.
Have feedback?
Help us make this page even more useful.
Tell us what you'd like to see expanded, which examples would help, or what workflow you want covered next. Every message gets read.